At this last garage sale, we actually made out like bandits due to the help of a dear friend and fellow Memorial Springs Ward member. Due to REI’s return policy, his return was our gain. He recently had returned his REI one-man tent and he mentioned it to Ben who carpools downtown with him. We were with his son at the garage sale and he was dutiful in helping us find that one-man tent in the garage sale stash. Ben and Kyle camped out overnight to get at the front of the line so they would be in the first batch of shoppers in the the store. Lance and I joined them before the store opened.
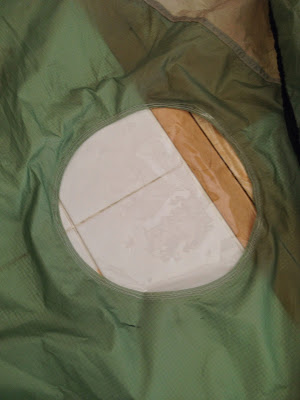
We managed to get that exact tent thanks to his son’s help!!! Score! They had priced it for less than $25 and the only thing wrong with the tent was that the window on the rain fly had torn off. It essentially came unglued and pealed right off the fabric. With a little handiwork from me, it would be “good as new” in no time. We also managed to score 2 more sleeping pads at that garage sale so we were happy with those finds as we were out of there for under $100 if you do not count the fact that we bought Ben his needed hiking boots for the trip so that he would have ample time to break them in.
So what do you need to repair a tent?
Heavy duty thread. Any color works if you are not worried about it matching exactly. Remember this is about utility, not about show.
A seam sealer. I had problems finding this, but after going into 3 stores, I finally found a store that had 2 different ones. I opted for the Coleman brand as it had a foam applicator tip and we felt it would be easier to apply.
Also, I recommend just cutting a fresh piece of vinyl for the window hole. I tried using the piece that came with the tent as it should have been an exact fit as it came off the tent, right? Not exactly. It was slightly too small for the hole, hence why it pealed off in the first place. Vinyl does shrink and stretch with temperature changes. In the extreme heat here it will do all sorts of fun stuff. Fortunately, I had plenty of heavy duty vinyl left over from making Lance’s lunch box so I just went and cut a piece that was probably an inch to an inch and an half larger in diameter than the hole I had to work with.
I also gave up on heavy weight heavy duty thread. It was too much hassle and stress. I went back to my high quality multipurpose thread. It is heavy duty anyway. It is not going to break by just looking at it so I figured it was enough. I knew that I would be sewing around it at least twice so I was not going to stress about it. I opted to sew around it three times for good measure.
Let me state that I cannot sew perfectly straight to save my life, but then you put it in a circle and I am just doomed. To do that 3 times around the window was a miracle it is as straight as it is. Sew with your needle down as the layers will shift.
I then trimmed back the vinyl so there was not as much left over on the back. I essentially cut it more flush with the seam on the back as I had a lot of hangover after stitching. Remember I cut the vinyl circle with lots of room just in case my layers did shift when I stitched it together. I did not pin so as to not put extra holes in the tent material or vinyl. I just trimmed away all the excess. I put a piece of cardboard between the vinyl layer and the tent layer while trimming so as to not accidentally cut the tent material.
Once that was done, I laid it out flat and sealed the seam on the back with the seal sealer. It said to let dry for two hours. I let it dry for about 4 hours because I ran out to run some errands. I then flipped it over and sealed the front side of the seam. I let it dry for a few more hours.
One tent fly window fixed!
The fellow ward member still had the ground cover for the tent at his house so he gave that to us as well.
Ben has a perfectly good, high quality one-man tent to take to Philmont.


Be the first to comment