
“I made a pattern using CAD” is a statement that may not seem important to some people in the world, but to me, it is a huge accomplishment. Most importantly, this pattern fits me. It is not perfect and it can use some refinement but it is a huge accomplishment. I did it!
I wish I had learned more from this class, but it is what it is. The fact remains that I can officially say that I know how to use Gerber Accumark to create patterns. That is a win!
APD 290 CAD Pattern Making
This class was a challenge.
There were huge gaping holes in the instructional materials. I was constantly looking for outside resources. We had videos using older program versions and PDFs of PowerPoint slides with minimal information. Unfortunately, the “outside resources” for Gerber Accumark are few and far between. Those that do exist are piss-poor extensions of the resources available directly from the software company.
Our instructor was mostly non-existent. I am not sure what her role was outside of grading papers. Online students need interaction with their instructors in some courses – period.
Thank goodness for the 2 other students remaining in the course with me because we carried each other through this. If we were frustrated or wanted to cry, we were there to crack a joke, share our struggles, and muscle through to the very end.
The Final Project
The final project was not enough in this course! Most apparel design courses I have taken at BYU-Idaho have been final projects instead of finals. I prefer this in a lot of ways. Projects are extremely time-consuming, however, they are practical applications of the skills learned in these classes. Essentially, they are portfolio-building projects if used correctly.
The project was to RECREATE a commercially sold jacket. We were supposed to use our personal-fitted slopers created in a previous class to do this recreation. The jacket must have a minimum of 12 pattern pieces including pockets and collar (or hood). We were to maintain the key finishing details of the jacket such as cuffs and openings (ie. zippers or buttons). We were supposed to get it as close to the original as possible. We did not have to use the original fabric type for the final production.
Completed, the jacket was supposed to fit us (or another model if approved). We were to create the patterns using Gerber Accumark Pattern Designer, print them, and sew the jackets together. Once that was done, we had to do a presentation about the process and present the final creations.
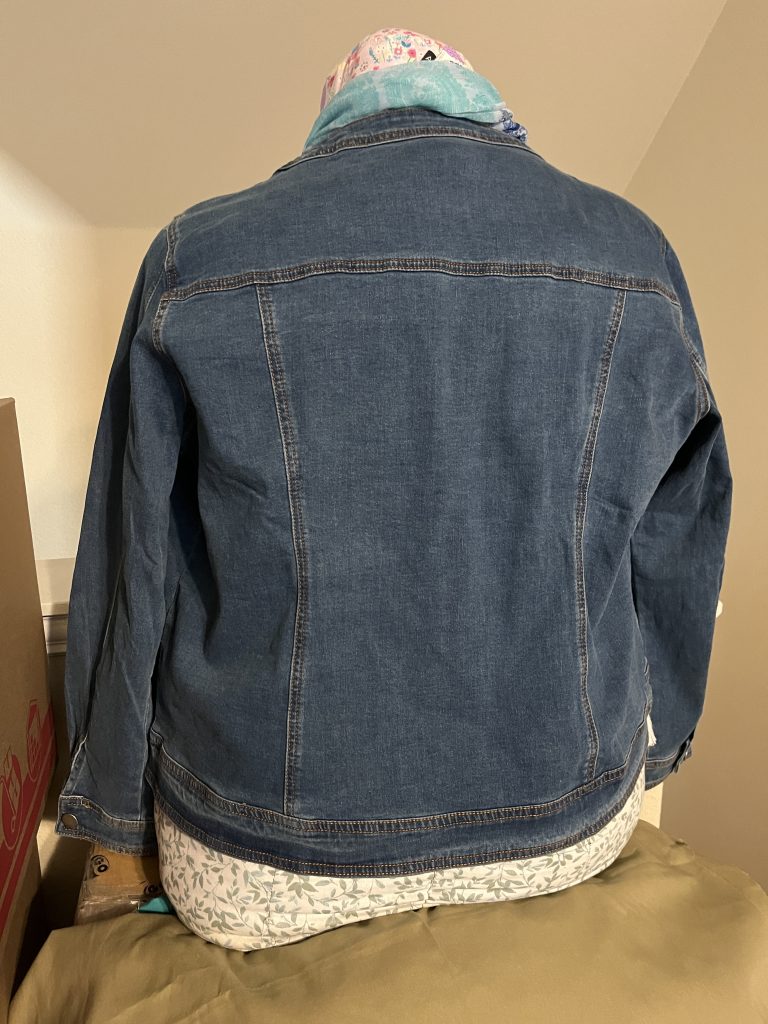
The original jacket


I ordered a jacket from Amazon. I ordered my size using my measurements against the ones provided by the seller. It did not fit! I could get it on, but it was very uncomfortable. It also did not button around my girth. My normal problem areas were very evident with this jacket. I am hard to fit so I hesitate to purchase clothes online.

This dress form is about my current size. It was sewn together at the start of the semester (2022) when I took the Fitting and Pattern Alterations class. I lost about 25 pounds that semester. My bodice sloper was created somewhere on the lower side of things. Incidentally, prototype 1 of this project made from my sloper fits as this jacket does on the dress form. You cannot see how tight those sleeves are on my body. I have gained most of those pounds back and the dress form is close to my size. It serves as a good model for this post. I will do a more detailed post later.
The pattern pieces
This jacket has more pieces than you would expect. I ended up with 24 pieces.
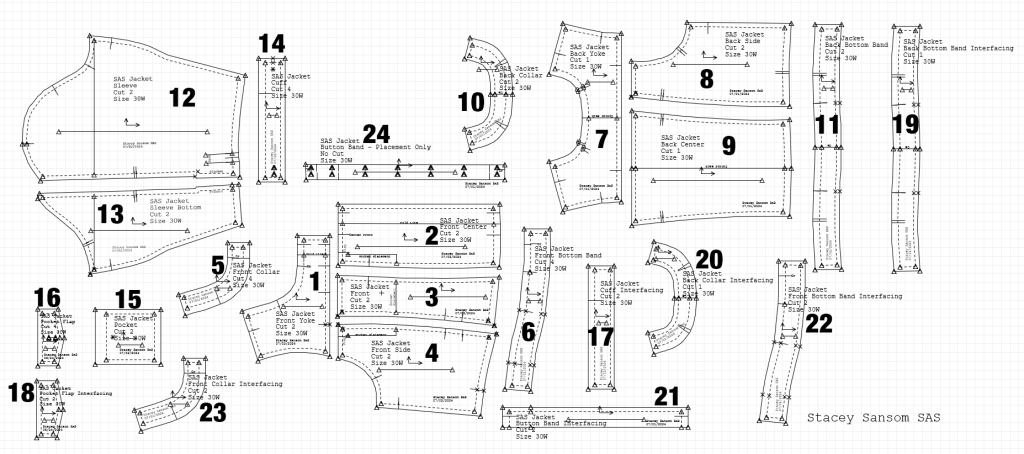
Yes, it has a collar. It has what is commonly called a banded collar. It has other names as well. It is frequently used on things like henley-style shirts and tuxes. This one lays flat, but you can probably visualize what type of collar I am talking about.
The final recreation
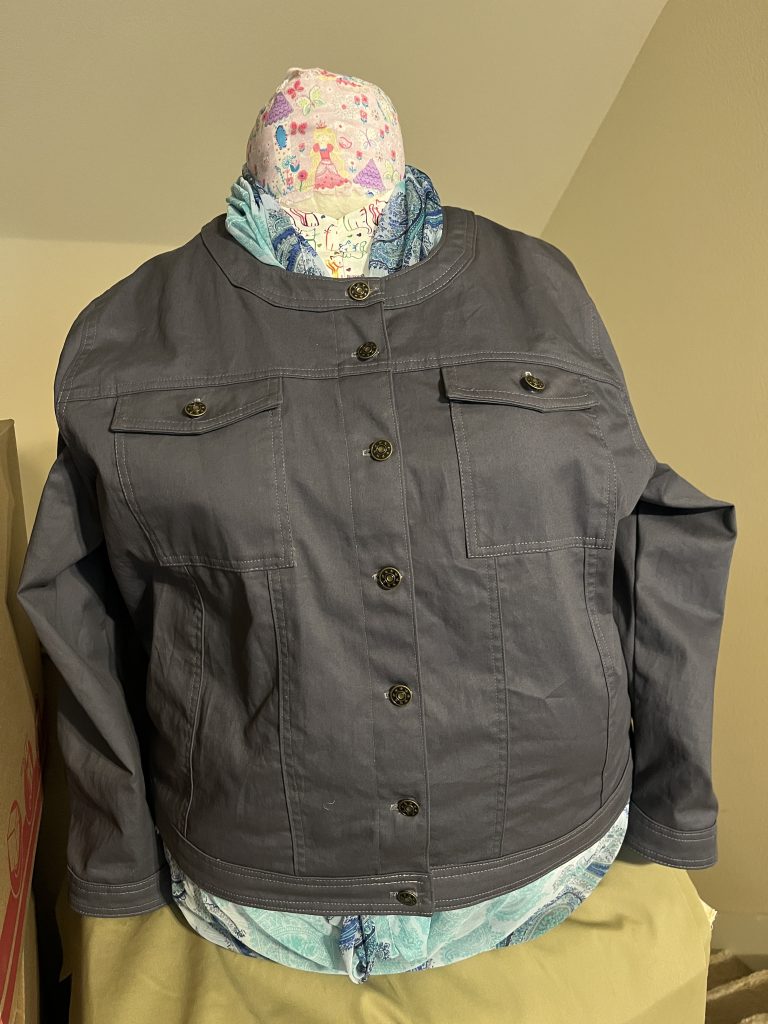
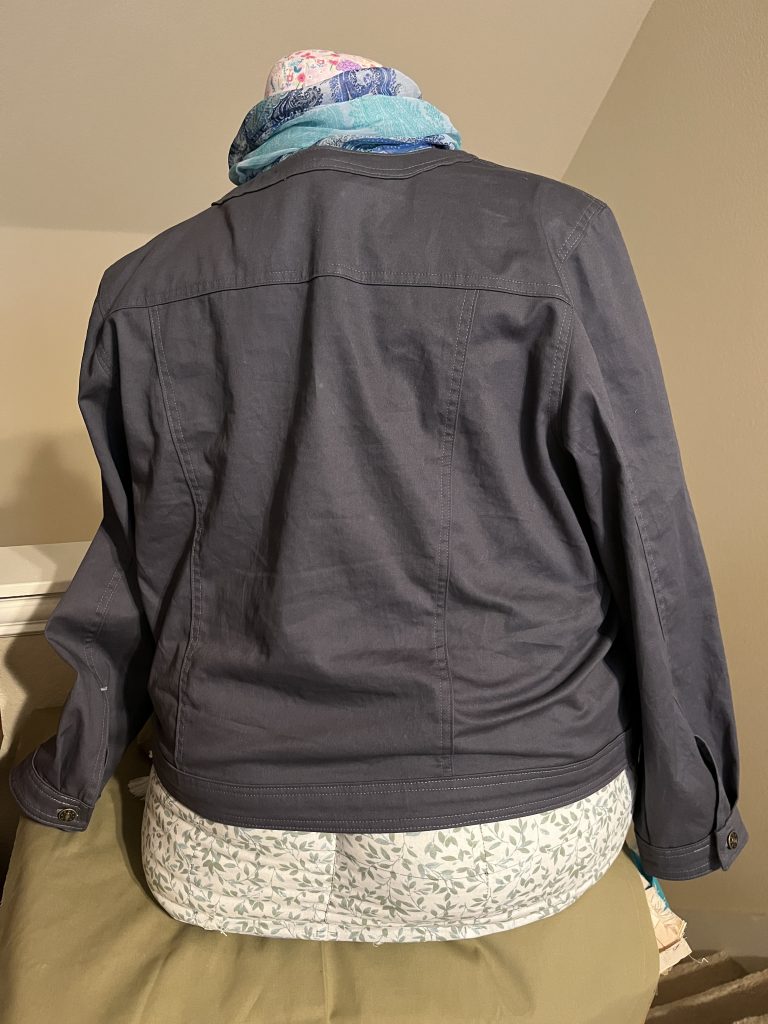
I focused on keeping things proportional to the size increase so some of my lines vary from the original measurement-wise. The overall look and feel of the jacket are similar to the original.
It is not perfect. This project took about 118.33 hours to complete. This included taking measurements, studying the construction, making sketches, and creating patterns in CAD. It included 2 fitting prototypes because my sloper did not fit me.
Reflection
This project reinforced my pattern-making skills. I was amazed at how much I remembered. It also required me to draw on my pattern alteration skills. Those were a bit harder for me. What we are taught is not focused on fitting plus-sized figures in either pattern-making or pattern alterations. This is a big gaping hole in the fashion world along with single arbitrary numbers to describe multiple curves.
It has renewed my desire to enter the plus-sized patterning world. Why? Options! More pattern designers help increase availability and increase “size inclusivity.” As an atypical plus-sized woman, this is important to me. Why? Assumptions are made. Patterns on the market today are designed with hips considerably larger than the waist. I dare say this, but they still design for the hourglass figure. I am not that.
The sleeves on this jacket are probably the best-fitting long sleeves I have ever worn from handmade or ready-to-wear clothes. I wear flutter and bell sleeves most often because my sleeves do not fit otherwise. I do not wear many collars anymore because they tend to be a migraine trigger – rubbing on trigger points. Also, I have a short fat neck and collars make it look shorter. This jacket does not rub and fits nicely around my neck. It does not feel like it is choking me. And, it buttons around my girth without swallowing me like a tent.


Be the first to comment