I am sure you have all read about how much the cinnamon raisin bread impressed my children by now. If not, they loved it! They want me to make it for them because it is so good. It is right up there next to them admitting to letting the bananas go spotted on purpose. I’ll come back to that another day, this is about the making of cinnamon raisin bread in all of its awesomeness…

This is what it takes to cinnamon raisin bread. That is all that goes into it anyway. You will need a mixer, some bread pans, and an oven to bake the loaves in.

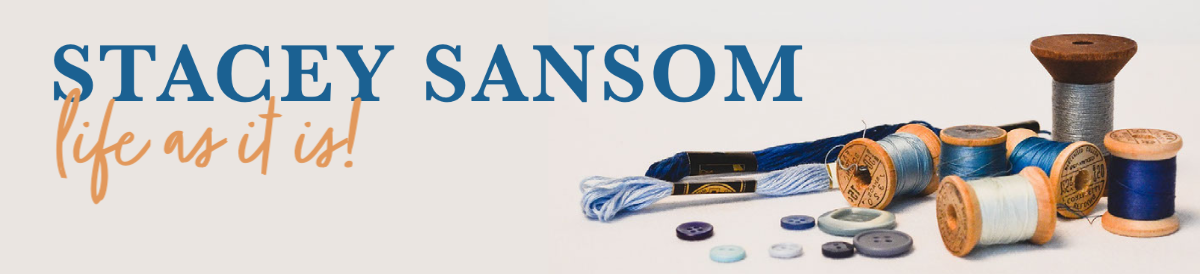
I would called these the “whipped” eggs but you’ll notice that I did not have on the appropriate beater to appropriately call it “whipping.” Maybe it is just a play on words? I do not know for sure what you would call this. This is the eggs. That is the beater. That is it going around and around and around. That is the eggs falling subject to the beater’s unrelenting twirling motion. There. You. Have. It. Beat eggs? They were beat into submission?

Adding the buttermilk. I have never really used buttermilk. I cannot say that I have ever desired to. I haven’t really showed an interest in recipes that called for it. As far as I could see, it was just one more miscellaneous ingredient to keep in the fridge with the high likelihood that it was going to spoil before I had the chance to use it. Life does happen and it happens regularly around here. The best laid intentions do not always manifest themselves. I honestly cannot say that I would have gone out of my way for this one either, except something prompted me to buy that half gallon of buttermilk when I was buying the other six gallons of regular milk that day last fall. How grateful I am for that prompting.

Adding the oil. I used olive oil. I use it almost exclusively. I have for years. People will argue that it is not interchangeable, but I have found for most things that I am cooking it works just fine. The original recipe called for canola oil.

Adding the vanilla. This is amazing vanilla. No, this is not your ordinary vanilla. Yes, I tinkered with the recipe.

Adding the sugar. There is quite a bit of sugar in this bread, but I will choose to look past that. I am actually going to try and reduce that simply because I am not sure that it is entirely needed. The bread is not overly sweet. It is sweet, but it is cinnamon raisin bread after all. The bread calls for a large amount of cinnamon. It does not, however, call for the higher quality cinnamon I have put into it. It is a sweeter cinnamon and so it does not need to be sweetened to compensate for the flavoring of it. I think I can successfully sweeten the bread a little less without changing the results too badly. I might just try that in the next batch.

Adding the flour a little at a time. There is a lot of flour for four loaves of bread. That is part of the reason you cannot do the whole half gallon of buttermilk at one time. It is just too much flour.
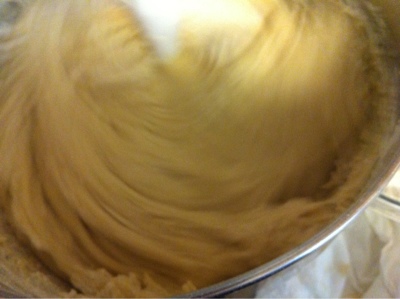
Adding more flour.

Adding the raisins. I would say that they are fresh raisins but I would be totally lying to you so I will not. They are as fresh as the bag inside the unopened box I purchased from the store in December. So fresh. They were fresh enough for this. They looked yummy. They fell willingly into the mixer bowl except for the few stragglers that stuck to the bowl…

Adding the last of the flour. I am not entirely sure why I did not just add it all before adding the raisins. I did not.
With cookies, I add most of the flour, add the chocolate chips and then add the remaining flour. I personally think that it helps better distribute the chocolate chips throughout the dough. I could of course be completely losing my mind, but it is all about perception and that is what I perceive to be true.
Scraping the excess flour off the top of the beater blade after stopping the mixer and a little off the side of the mixer bowl. Mostly it was just brushing the flour off the top of the mixer’s beater…
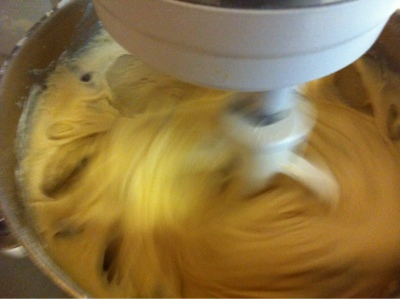
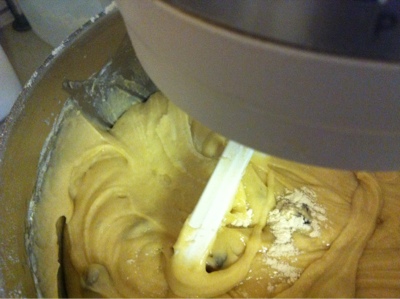
One last mix to blend in the loose flour from the top of the beater…and we should have…

A nice lovely cinnamon raisin bread batter ready to go into bread pans.

A half gallon of buttermilk yields eight loaves of cinnamon raisin bread. That is not a bad return on investment in my book. The time it takes, that is still in question. However, you have to do it in two batches of four and you need to have four bread pans ready to go. I tried doing it in three pans the very first batch I did. That was an absolute do not try this at home thing. Trust me, do it in four pans.
Here are the four bread pans greased and ready to go. Slicked and ready and waiting.
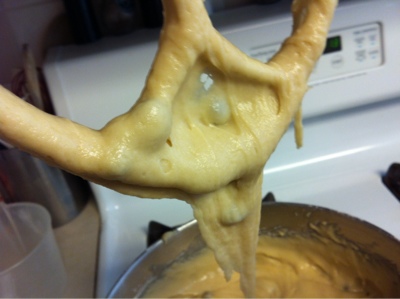
What the bread dough/batter looks like. I am not sure it is correct to call it dough as it is not a dough per say. It is a thick pasty batter. It is sticky. One should not be alarmed. This is consistent. Consistent results are good. It means that I have either done something right or I have done the same thing wrong more than once, either way I have achieved the same results. This is good in my book. Replication is always good when you “tinker” with the recipe as Kyle likes to say.
Do not be alarmed, this thickness makes it interesting to get it in the above mentioned bread pans in the manner described in the recipe. The first part is not so bad. The second part is pretty easy as well. It is the part where you repeat part one that it becomes interesting with your paste like consistency. Not sure. I’ve gotten this consistency three times now.
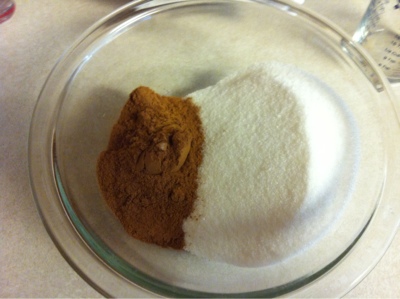
The cinnamon and sugar ready to be mixed together. This is the cinnamon and sugar that will ultimately become the cinnamon sugar swirls in the cinnamon sugar bread.

The cinnamon and sugar mixed together. This is a lot of cinnamon and sugar. I think I will try and reduce the sugar here in the next batch. I have had some problems with the bread loaves remaining “gooey” in areas around where the cinnamon sugar mixture is, but only in areas. It is not an overall problem. I do like the cinnamon, but I think just a tad less sugar. The half-half-gallon version of the recipe calls for 1 cup of sugar to do the cinnamon sugar swirls. It just seems to be too much now that I have done the recipe again. I am going to step it down a little the next batch.
All is fair in trial and error. The kids will eat it unless I burn it beyond recognition so it is all good.

Now in order to turn this lovely pasty looking batter into what people will recognize as that swirly cinnamon raisin bread, we have to put in a little bit of blood, sweat, and tears. Yes, we are going to have to work for our cinnamon raisin bread. I know it almost does not seem fair. We have to go to the store and buy all the supplies and then we have to come home and find the time and energy and motivation and inspiration and I could go on…and then we have to actually WORK to get this stuff put together to resemble something close to cinnamon raisin bread? Yep, that is right folks, it does not come easy.
We’ve got to divide the remaining supplies between the four bread pans…

You are going to spoon about half of the bread’s batter evenly between the four bread pans.
I just used the rubber/silicone spatula I used to scrape the edges of the bowl with. I used it to scrape the beater with. It was already in use. It made perfect sense. Sometimes I feel ambitious enough to dirty more dishes. Sometimes not so much. This was one of those times I was not willing to dig out another more efficient tool to get it all stuck up with the sticky goop in the bowl.
There is no exact science here. Just scoop it out and spread it evenly on the bottom of the pans. I did a scoop in each pan and rotated just like dealing deck of cards. Nothing too complicated here.

Next we are going to take about half of our cinnamon sugar mixture and we’re going to sprinkle evenly over the top of this layer.
I went for a little bit more than half. Do not be shy as this will become your center swirl in your bread.
You will notice how the moisture in the batter is moistening the fine cinnamon? Yummy! Loving this cinnamon. It smells so divine already and I have not gotten it baked yet.

Now we have the rest of the batter to get evenly distributed between the four bread pans. That is evenly distributed on top of that sugary goodness. Remember that you now have a sticky and pasty mess to slop down in your pans and you have got essentially fine sand on top of what you are dropping it down onto. Good luck getting it to stick. Actually, it is not that bad as it is heavy and it does drop off the spoon and it does drop and drip and flow and whatnot. So it does work. Just be patient and you can get it dropped on top and evenly and whatnot.
Remember it is perfectly fine if your first batch (or two) do not look pretty. They still taste amazing!

It really is fine if you do not get a perfectly even or even perfectly smooth or cover all the cinnamon sugar mixture underneath. It really is just fine. Do not stress. The step after next will take care of it and no one will know unless you open your mouth and tell them. So zip it already.

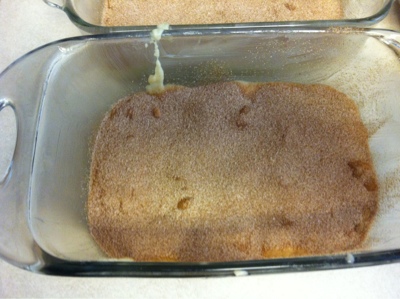
Next we are going to take what remains of our cinnamon sugar mixture and we’re going to sprinkle evenly over the top of the batter in the four pans. This is your final layer in your pans so you can now rest easy and be assured that you are almost done.

From experience I learned you did not want as much cinnamon sugar mixture on top. This is part of the reason why I was a bit more generous in the middle layer than the recipe said to be. It said half and half. I tried that. No. I’ll go a little lighter on top thank you very much. It was a bit crumbly on top and it certainly was going no where near my toaster with it crumbling that much. Nope, not happening. No way, no how.

Time to swirl!
All that work to make it nice neat layers and you are going to mess it up. I just used a butter knife. You do not need anything fancy.
I went back and forth across the width of the pan and then across the length of the pan.
Just have a swirling good time. Not too much, just swirl. You can see here just how much it messes up, so do not panic if it looks not so great. It should not. Do not worry, I figured out how to make the top of the loaf look pretty again. Yes, I did.
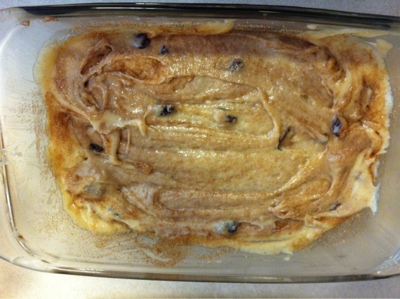
Use that butter knife to just smooth out the top of the loaf in the pan. Just spread it out. Do not worry, it will work just fine.

Repeat for all four loaves. You now have four loaves of cinnamon raisin bread ready to go into the oven for baking. It is quite the wait but oh does it smell good while it is baking!!!


Four absolutely delicious cinnamon raisin bread loaves! My children were begging to have me cut one. Of course as fast I cut one the pieces will disappear…
Be the first to comment